


HB Industries Drill Bit Kit, Evo Trigger
Since it seems like the interwebs enjoyed the last article about CZ Scorpion EVO accessories, I got the go-ahead to write a second one. I like to please the consumer, so I polled a Scorpion Facebook group to see what they wanted to see next. Triggers came out far, far ahead, blowing out magazines by 20+ votes. Naturally, I began researching aftermarket triggers, but I quickly ran into a problem.
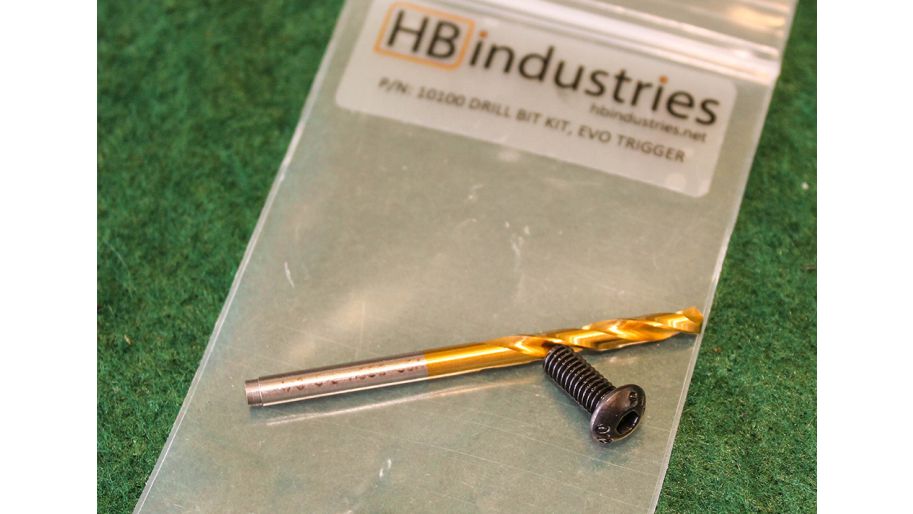
Apparently there's this thing called a "welded trigger pack." CZ did this in order to make their guns worldwide exportable. Basically, once they install the trigger pack, they slip a collar over the internal portion of the screw, then weld it in place, preventing removal of the screw (and the trigger pack). If you're wondering what a welded trigger pack screw looks like, see the picture below: 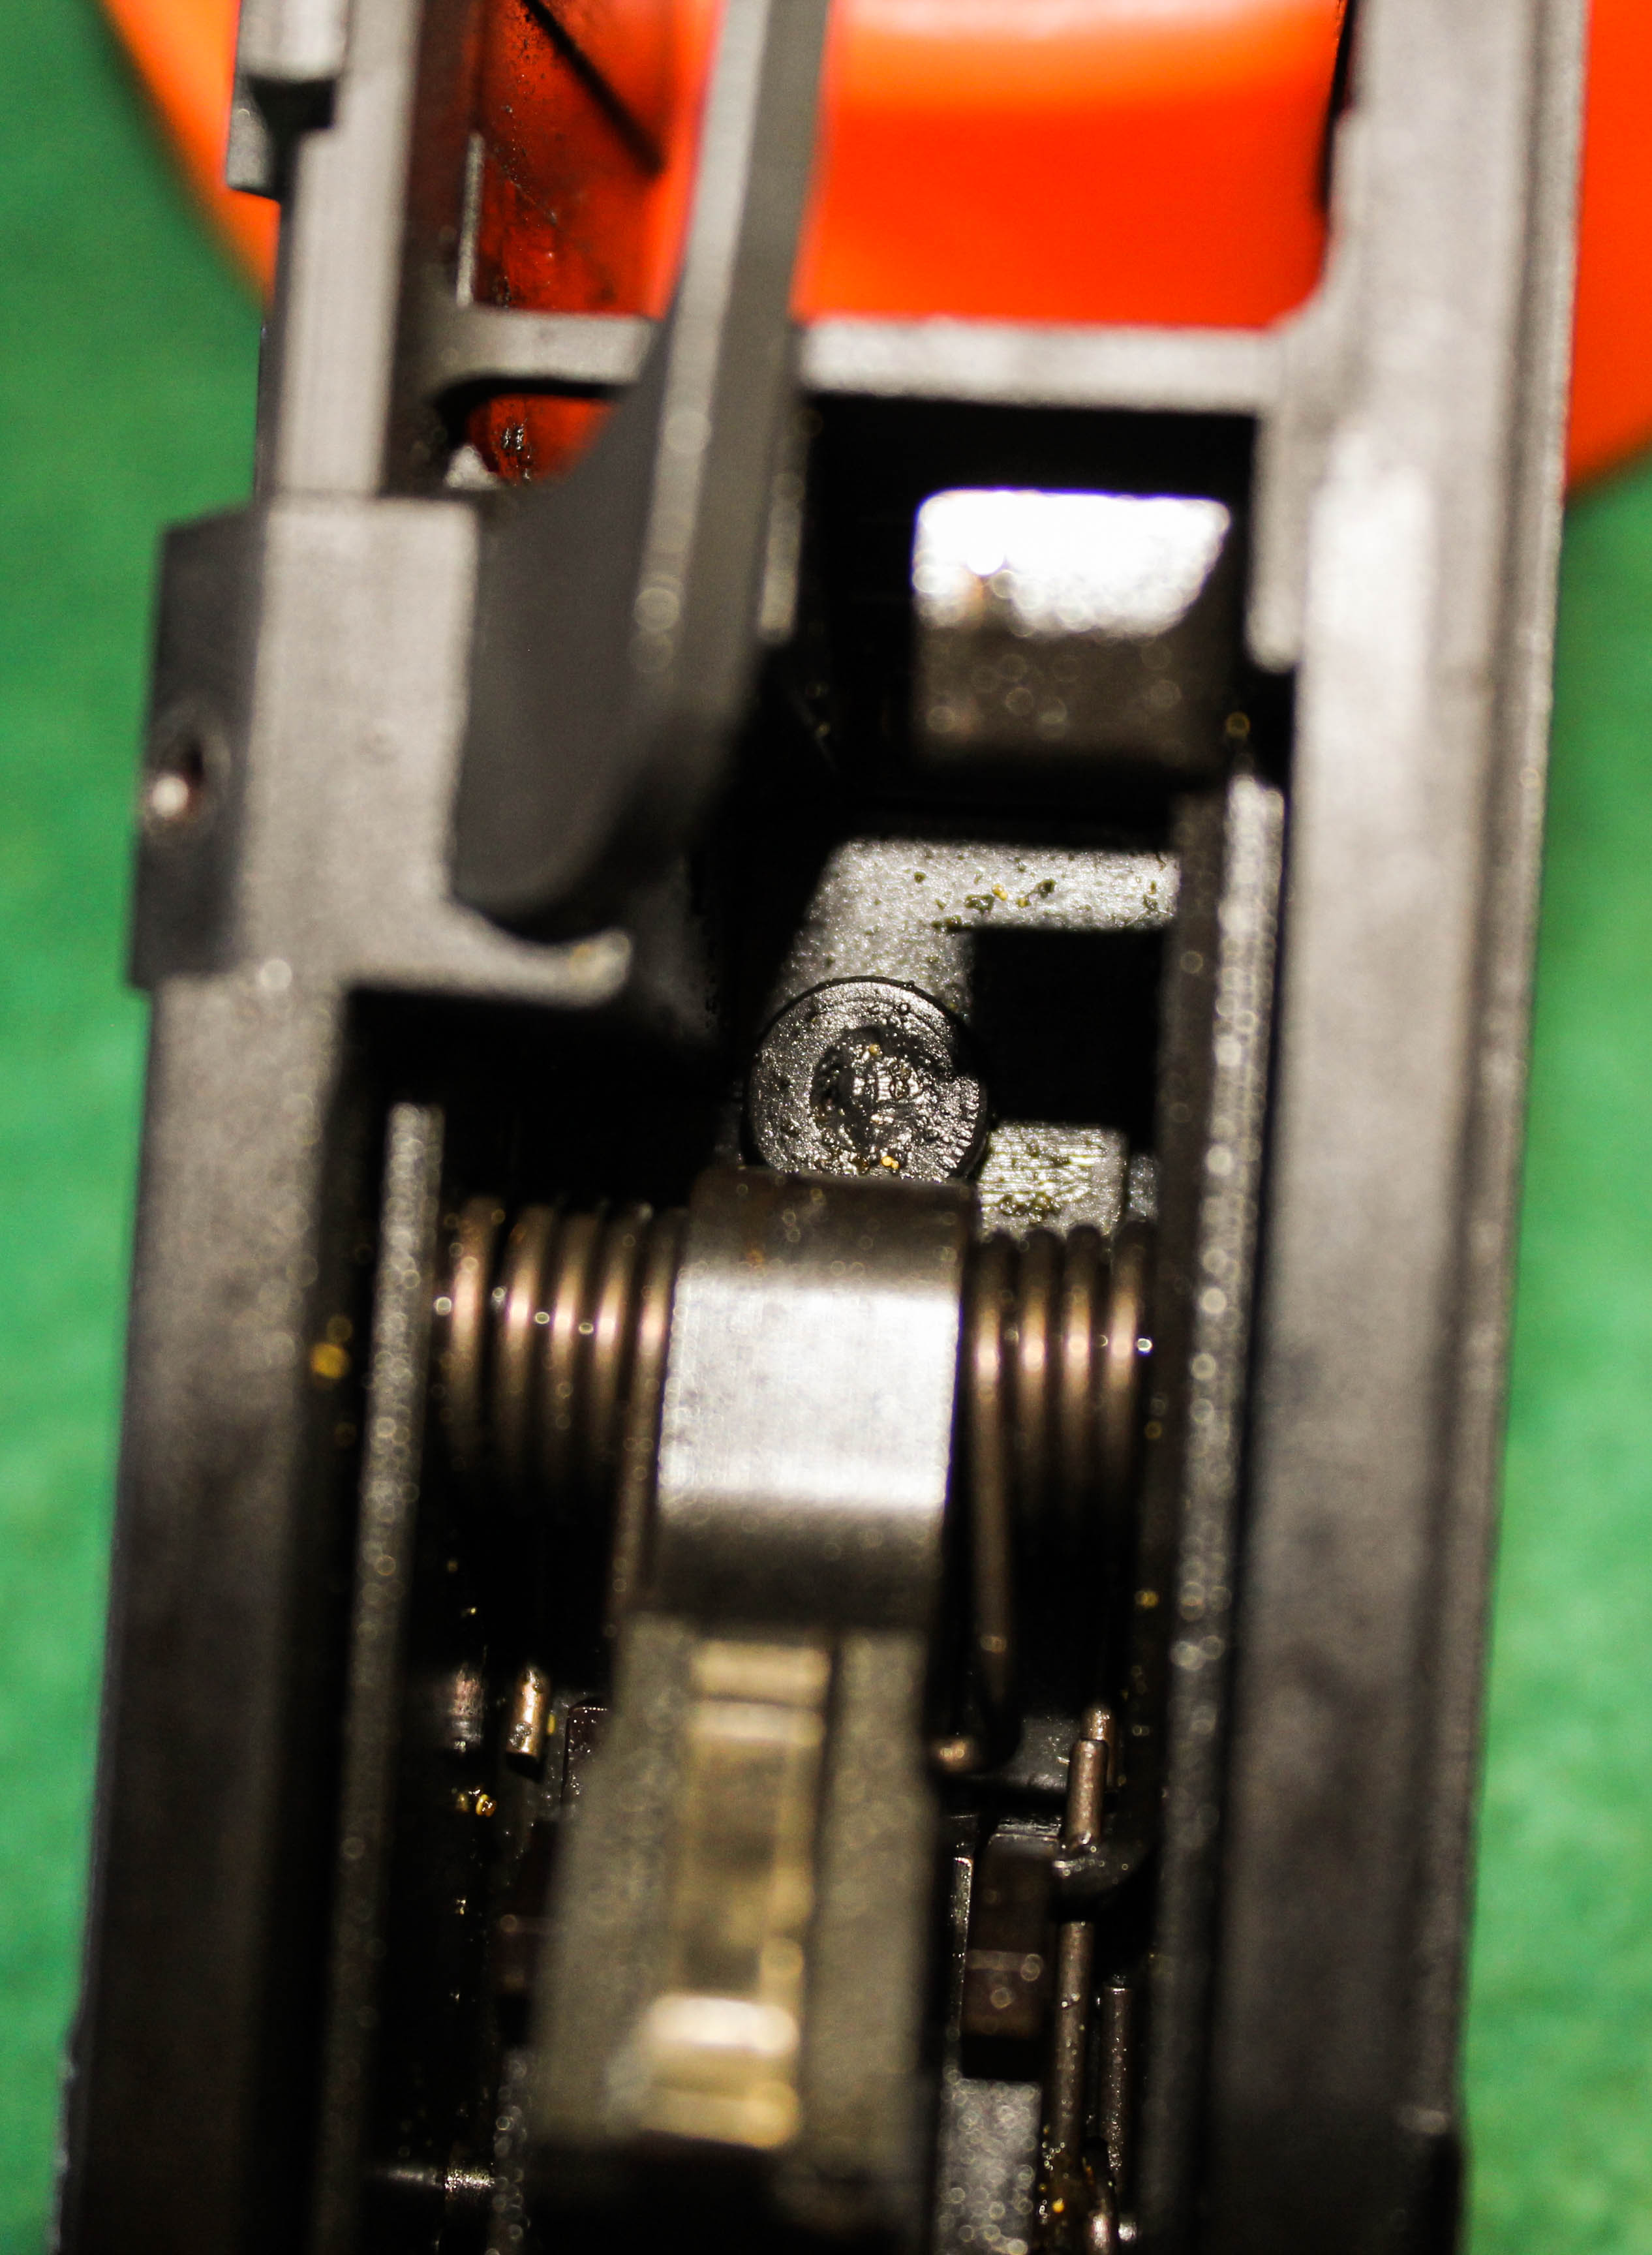 Thankfully, HB Industries has an answer for the do-it-yourselfer. For $6 (not including shipping), and about 15-20 minutes of your time, you can drill out the welded screw and replace it with an HBI-supplied screw. The Drill Bit Kit comes with a small drill bit that HBI selected specifically because it is shorter than your average bit. Because it is shorter, it's less likely that you will damage your hammer (if you attack the screw from the top), or your trigger guard (if you attack the screw from below). HBI recommends attacking from below, for reasons they explain in their instructional video here: I went with HBI's recommendation. I used a little bit of gun oil as lubricant, and took it very slow. The bit chews through the screw fairly quickly, so be careful with the amount of pressure you apply. Once I could see that the bit was starting to separate the screw head from the hreads, I used a pair of needlenose pliers to twist off the head. Once the head was removed, the trigger pack pulled out easily.
  Here you can see the threads of the screw after separating the head. After you've pulled the trigger pack, you'll still need your pliers to slowly remove the threads through the top. Because of space limitations, you'll only get about a quarter of a turn each time, so it took almost as long to turn the threads out as it did to drill the head. Once it's out, clean the trigger pack and lower of any loose metal flecks from the drilling, and you're good to re-install with the provided screw.
 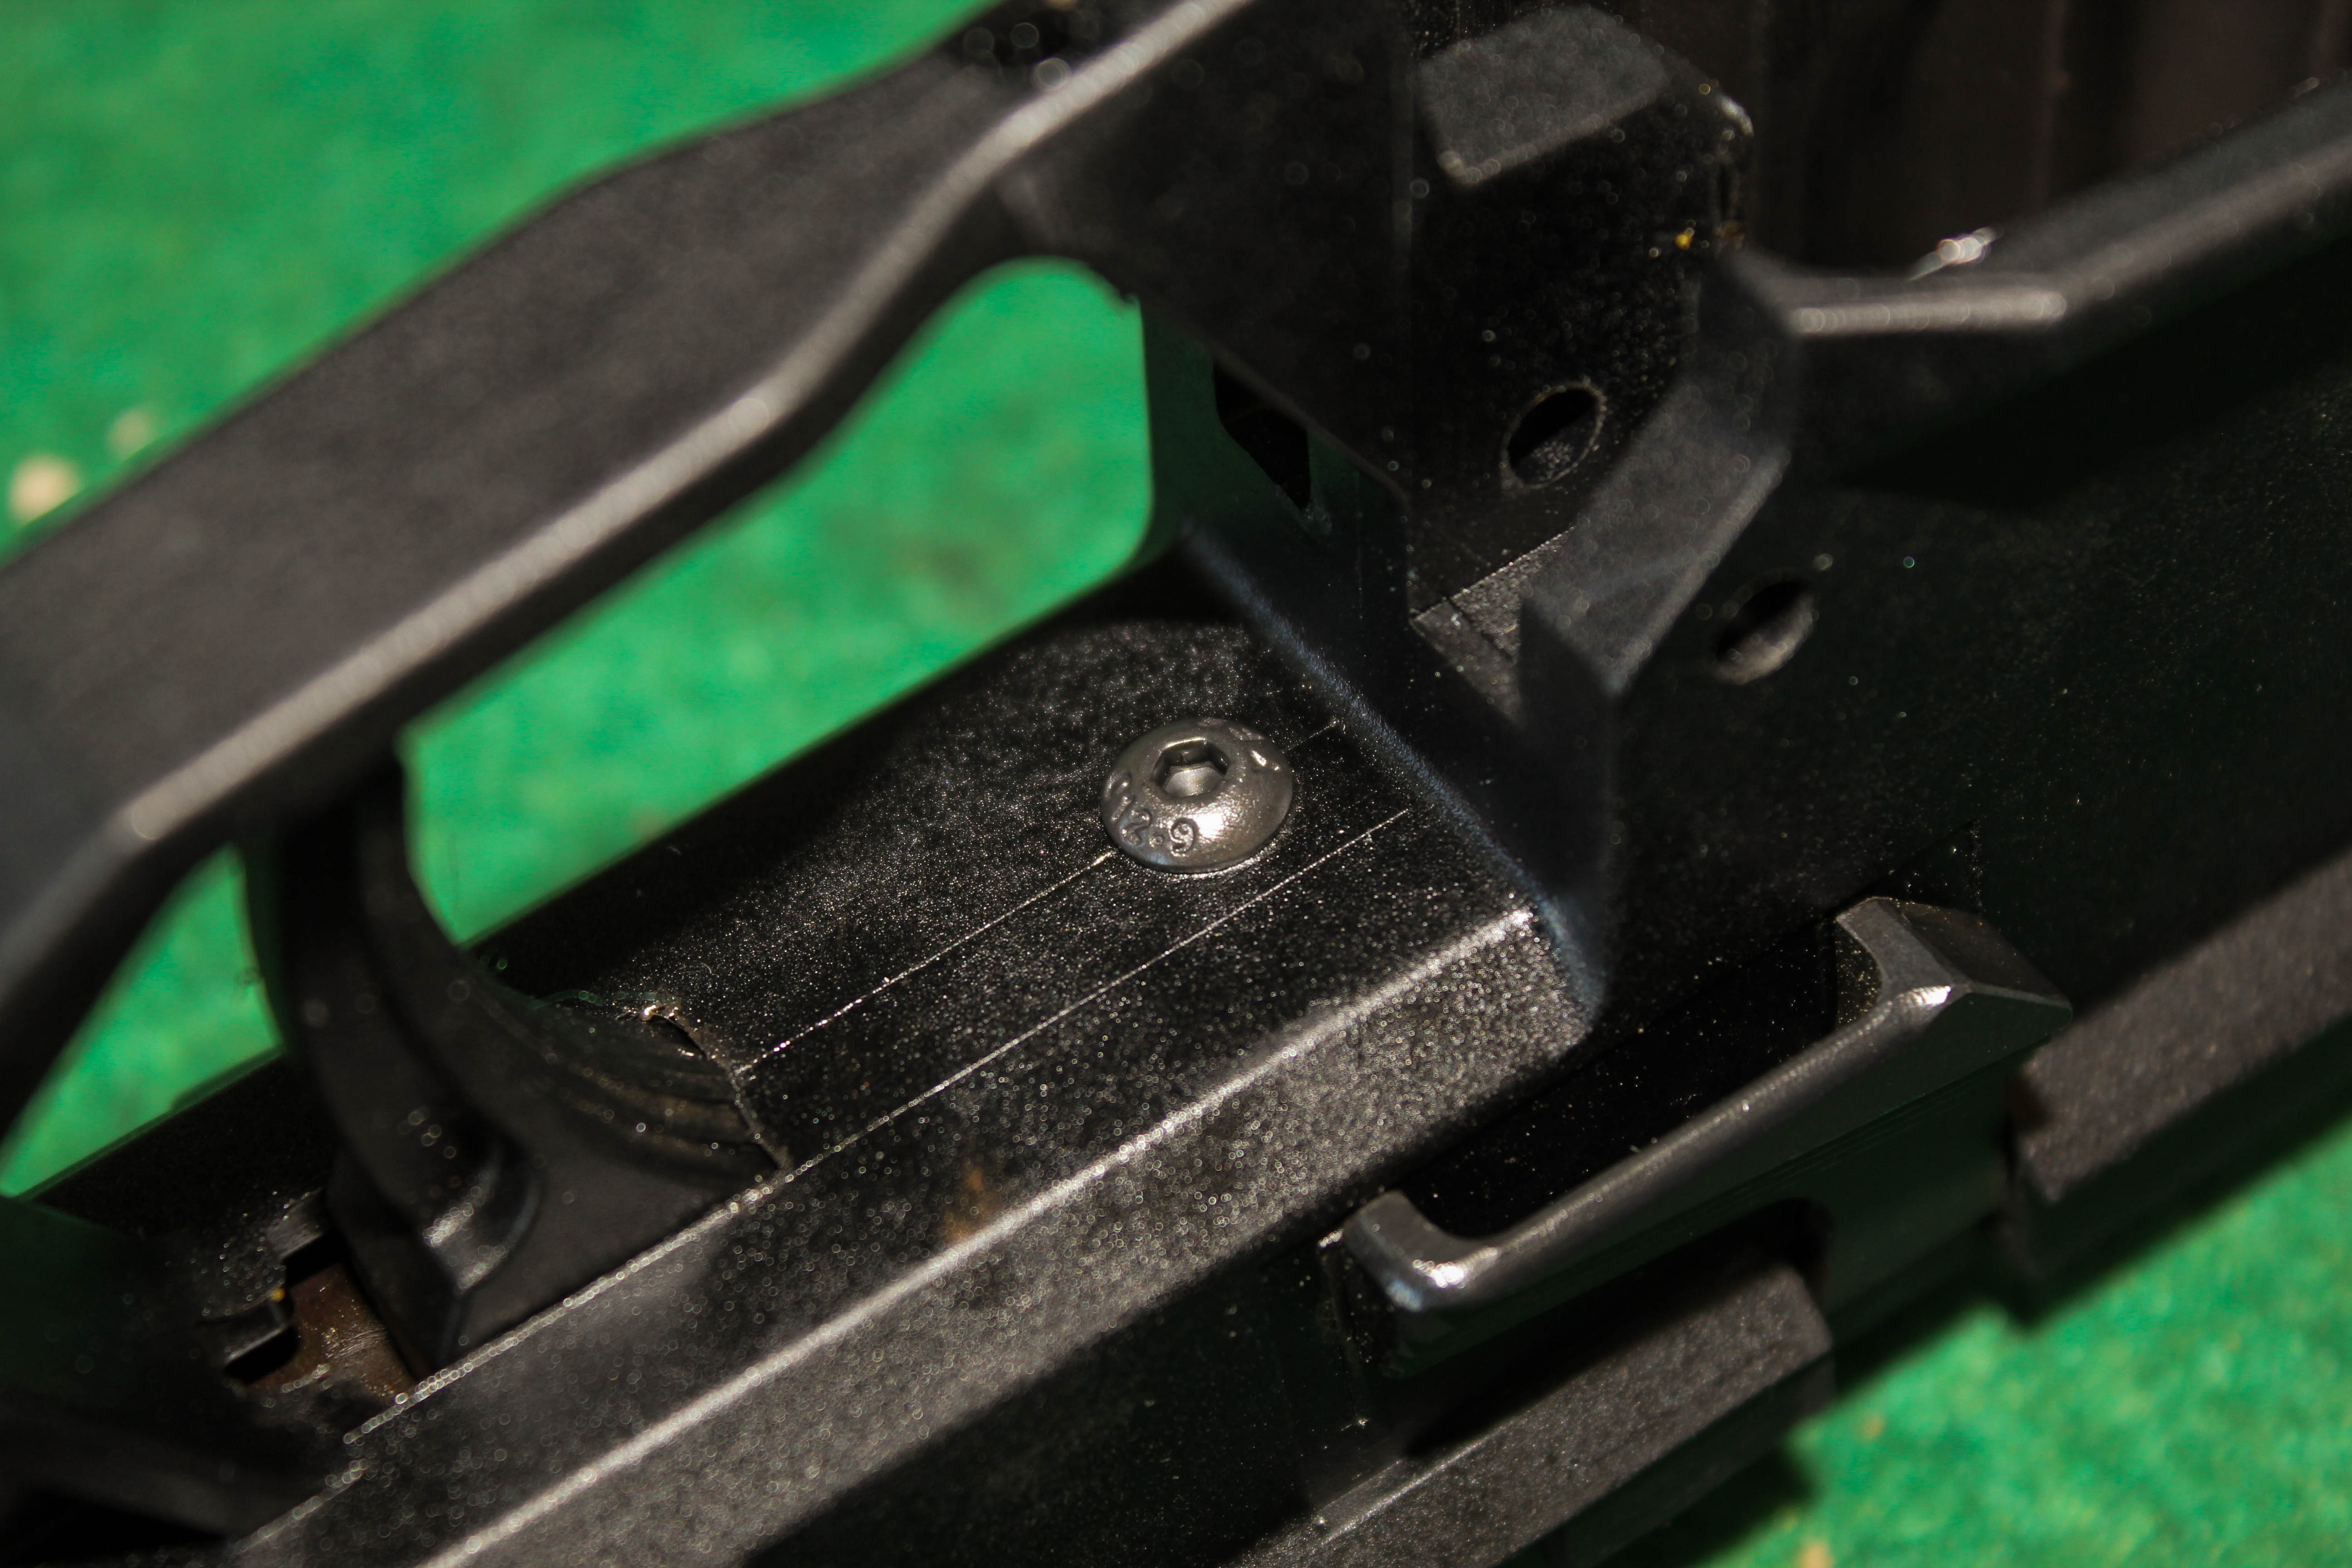 New HBI-provided screw installed Now, in fairness to CZ, they do have an exchange program for welded trigger packs. They say that they will exchange them as new trigger packs become available. But, if you're looking to get it done now, the HBI kit will make short work of it. I hope this has been helpful. If so, feel free to share. As always, Rainier Arms stands ready to help you Pursue Your Passion.


